
Last week we wrapped up our unit on area and perimeter. Let me just say that it was a breath of fresh air after struggling through elapsed time. I think by this point we ALL needed an easier topic to tackle.
… I know I sure did!
Luckily enough, area and perimeter was the next concept on our pacing guides. I knew this topic tends to come easier for 3rd graders. These are also skills that kids enjoy learning about and lends itself BEAUTIFULLY to hands-on learning. So that’s exactly what we did!!!!!
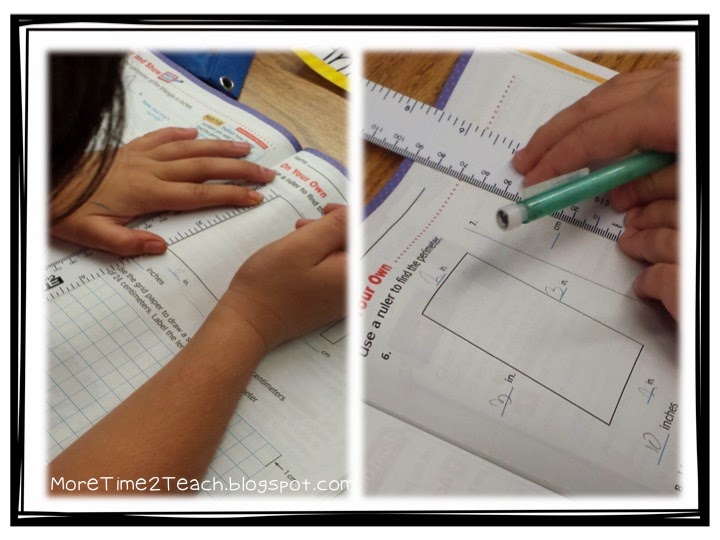
 We started off slowly in our textbooks.
We learned the word “perimeter” and we even practiced our measuring skills.
We then moved on to an interactive activity from Blair Turner that had us using different methods of finding perimeter. For some examples students had to simply add the sides that were given, for others they had to use “tick marks” to count the number of units around a figure.
I used this activity as an assessment and my students LOVED it!
 |
| This student chose to use tick marks to find perimeter. |
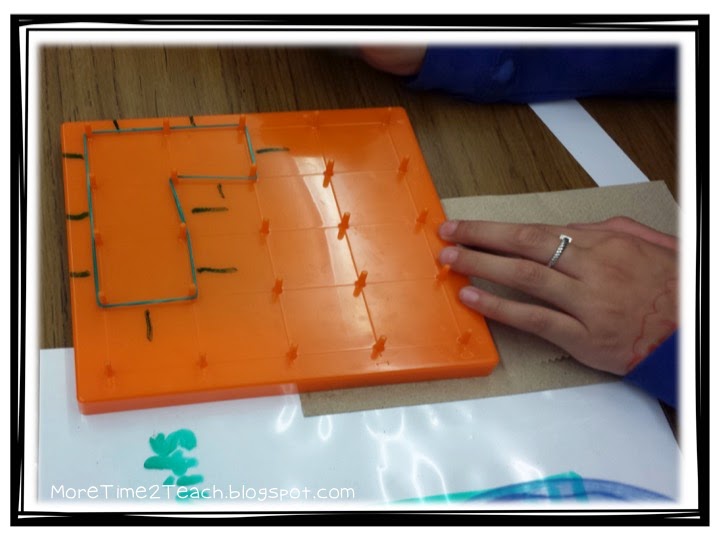
Next, I gave my students Geoboards with different shapes and asked them to determine the perimeter. That’s it… I didn’t give any further instruction! (For some this was hard… they wanted to know exactly how I wanted them to find the perimeter… sorry it was time for some problem-solving skills to kick in!)
After an initial pause and the deer in headlights look, their math skills took over (thank God) and the class was buzzing.
 |
| This student chose to use a ruler to figure out the perimeter. |
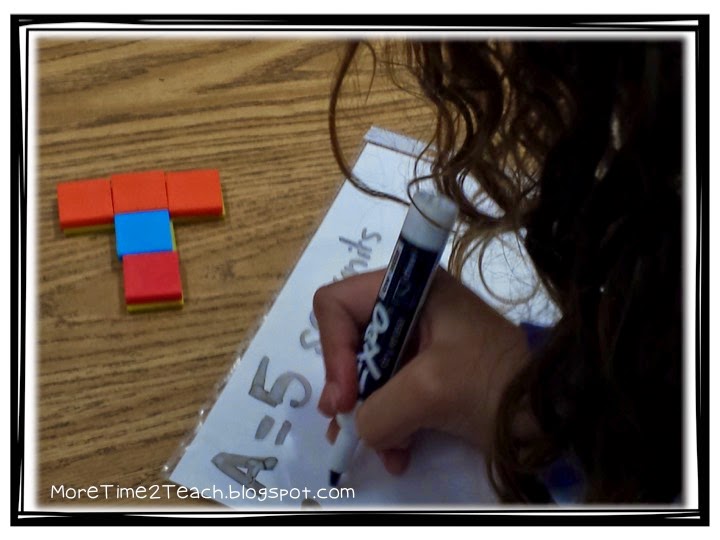
We then moved on to area… We began in our books and quickly transferred to manipulatives. (Much more exciting!) I gave my students pentominoes, the yellow shapes you see in the pictures below, and they practiced finding the area.
Students used square tiles to place on top of the pentominoe letter T.
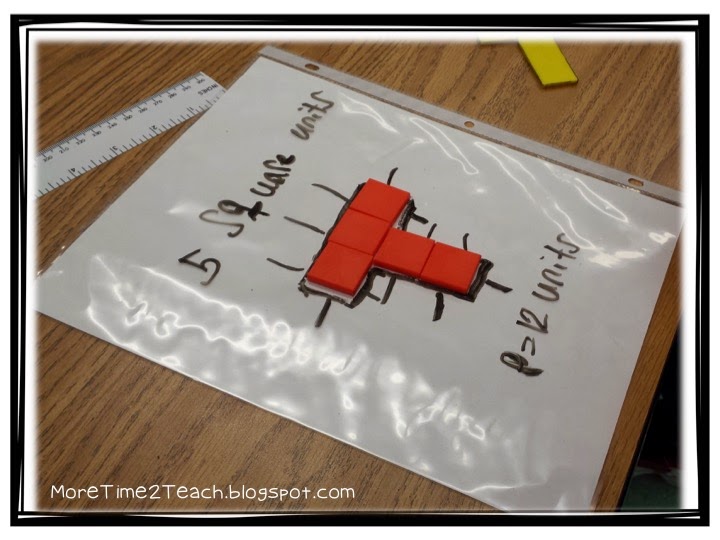
We ALSO found the perimeter! (I needed my students to “see” the connection between perimeter and area. Plus some extra practice never hurt, right?)
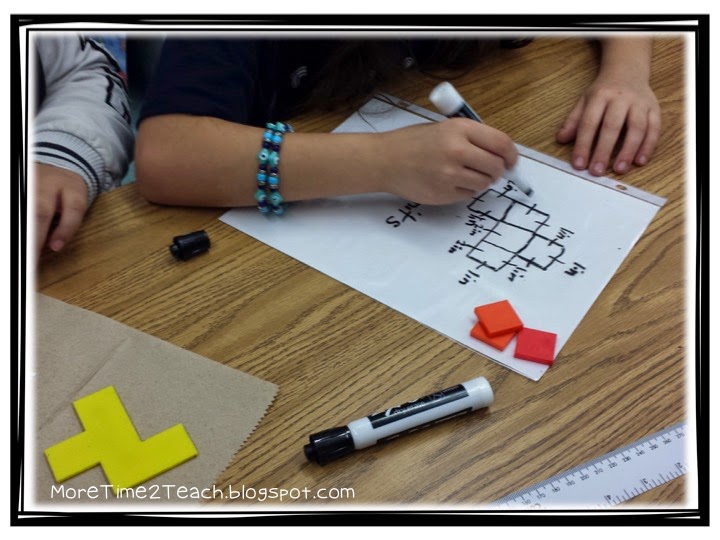
Eventually, they figured out that each square tile was an inch and no longer needed to place the tiles on top.
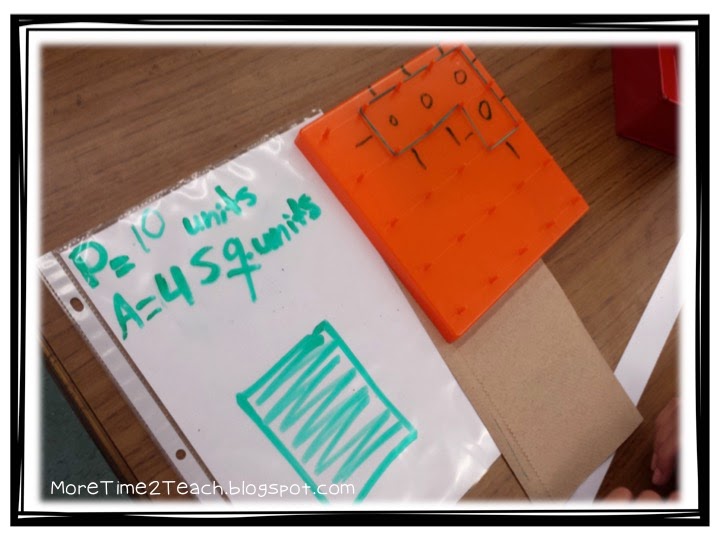
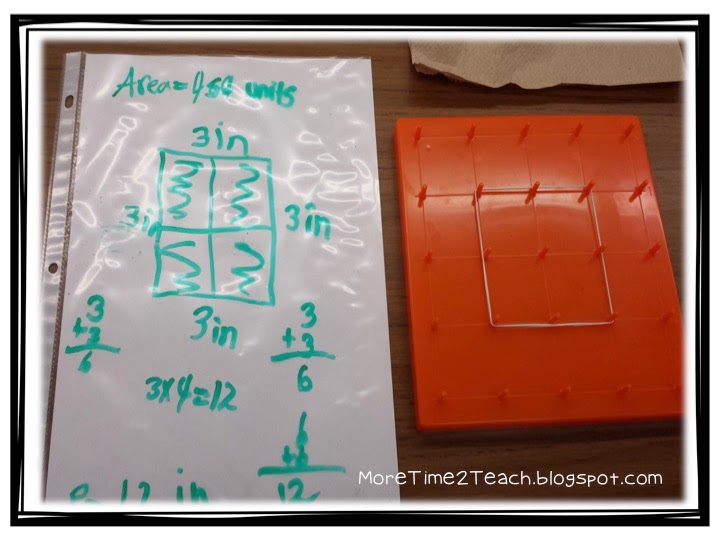
We then went back to our Geoboards and found both the perimeter and area of a shape. Again I let them use whatever method they felt most comfortable with. The only requirements was that I needed to “see” their thinking. (That’s a biggie in my classroom!)
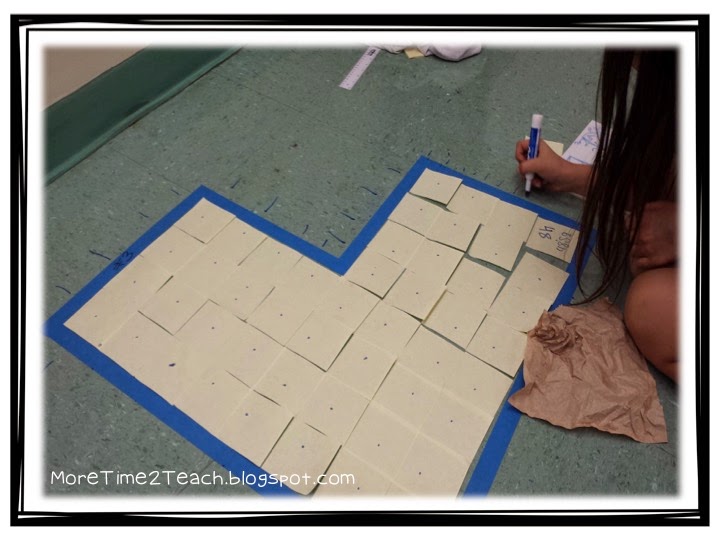
Another day, I used painters tape to tape off different areas on the floor. At each station I provided students with rulers, Post-its, Expo markers and white boards. Again the only instruction I gave was to determine the perimeter and area of each shape.
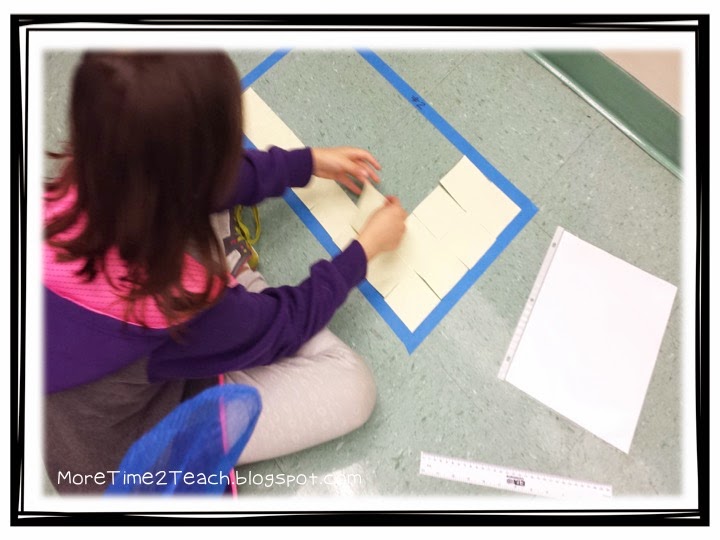 |
| Finding area with square Post-its. |
 |
| Today we learned that we can use our floor tiles and Expo markers as white boards. |
As you can see above, this student felt more comfortable using “tick marks” to find the perimeter and that’s okay.
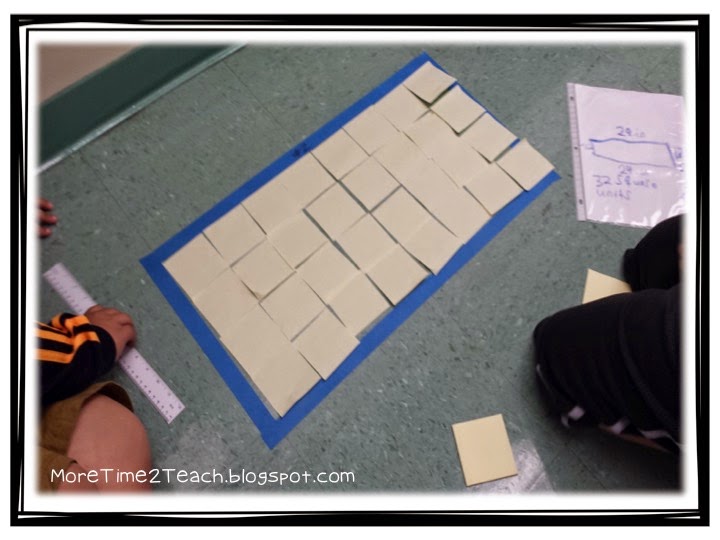 |
| This student used his ruler to find perimeter. |
Both groups accomplished the task at hand even though they used different strategies to determine perimeter. YAY!!!! I was SO PROUD of my KIDDOS!
The best part was that they thought I was the COOLEST TEACHER for letting them use soooooo many Post-its. :0)
 |
| Minecraft-ish math lesson… (I’ll do just about anything to ensure they’re learning!) |
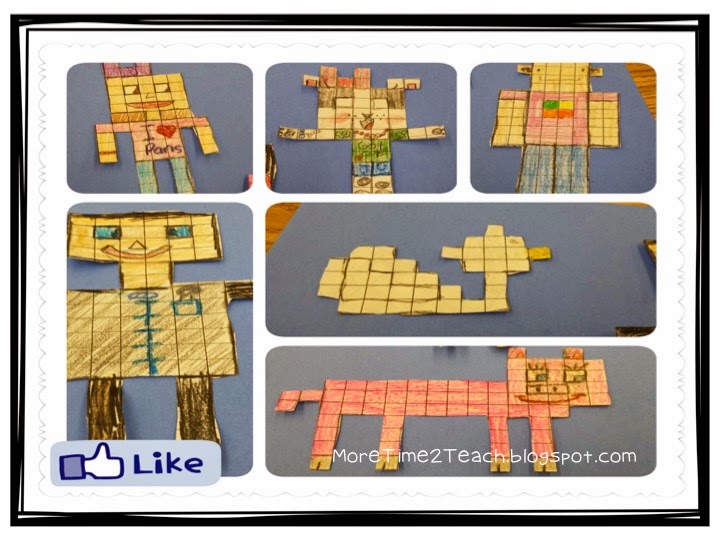
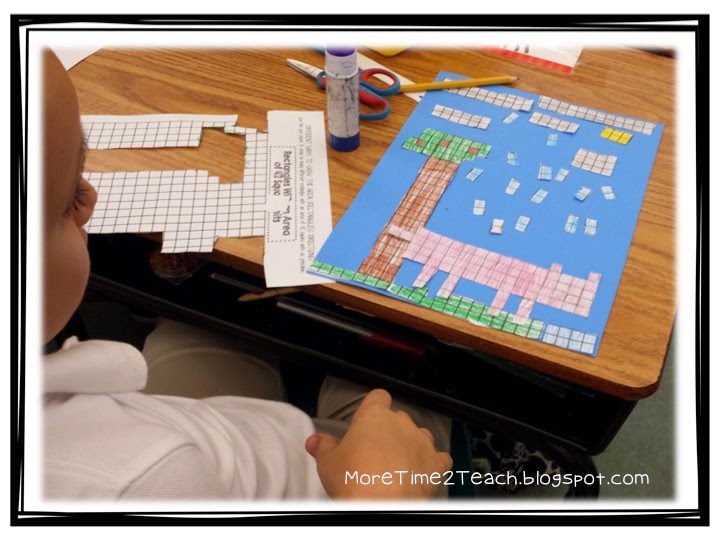
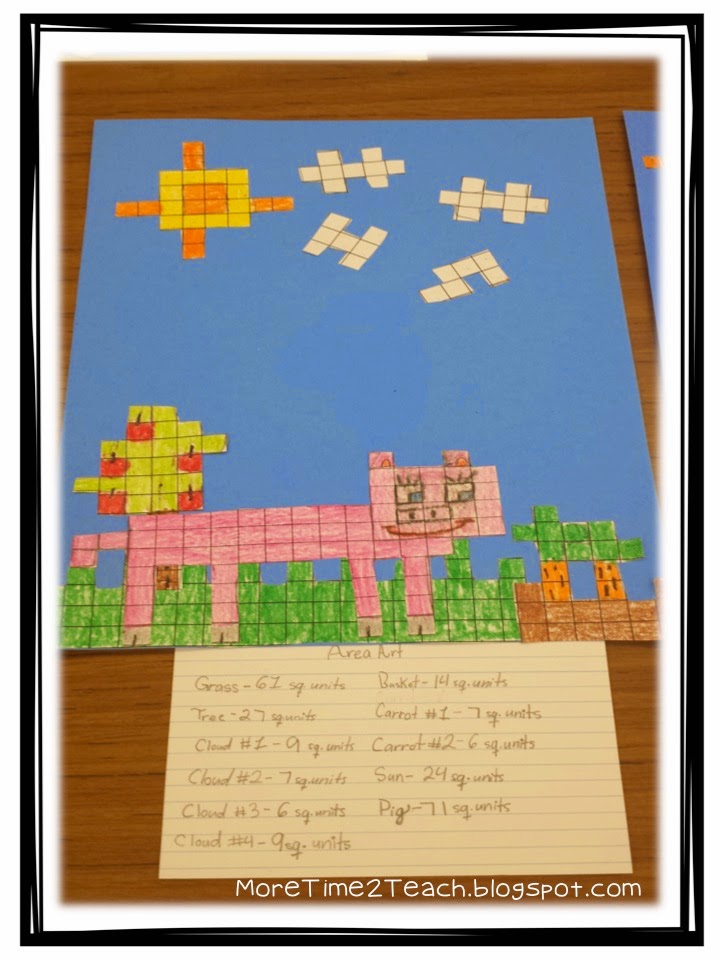
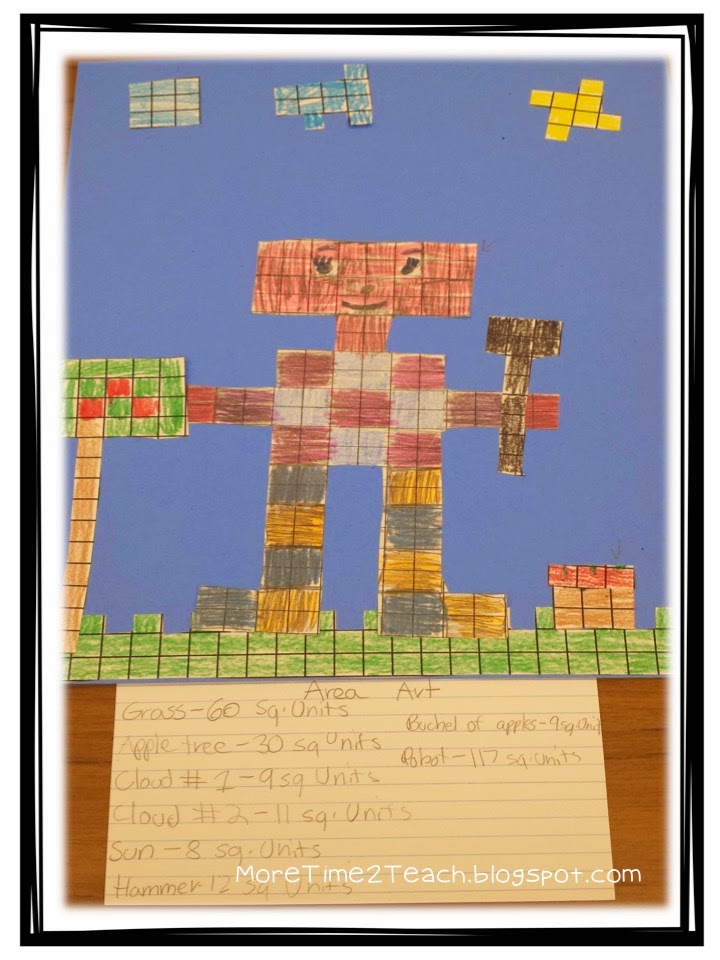
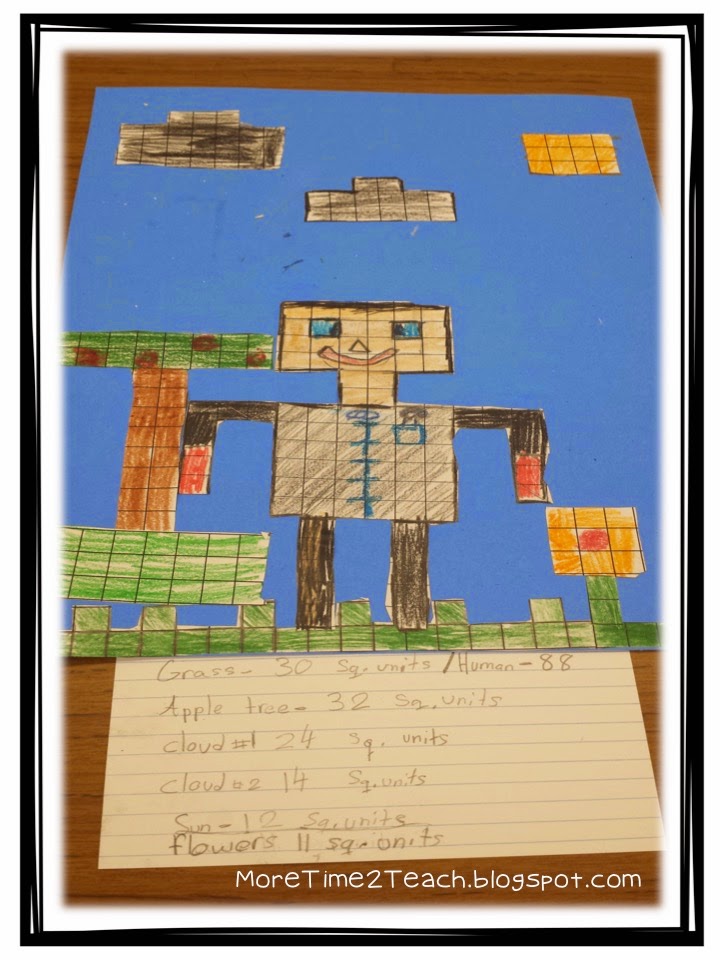
Our culminating project involved a Minecraft-ish math lesson focusing on area which we completed on Friday!
It was AMAZING to see my students math skills and creativity come together AND to see my students ENJOYING themselves.
(Poor babies have been working so hard getting ready for the FSA… they so deserved this lesson!)
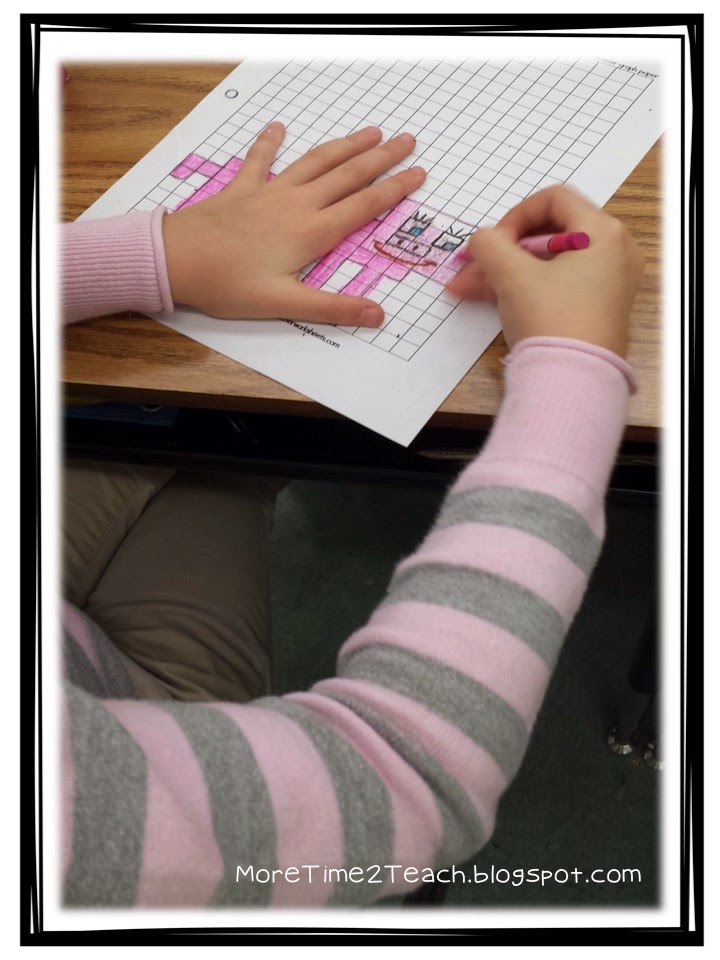
I began by giving each student a sheet of 1 cm grid paper and telling them to create an original character of their own, similar to Minecraft. It could be an animal, a robot, etc…
 |
| Then they created a setting for their characters. |
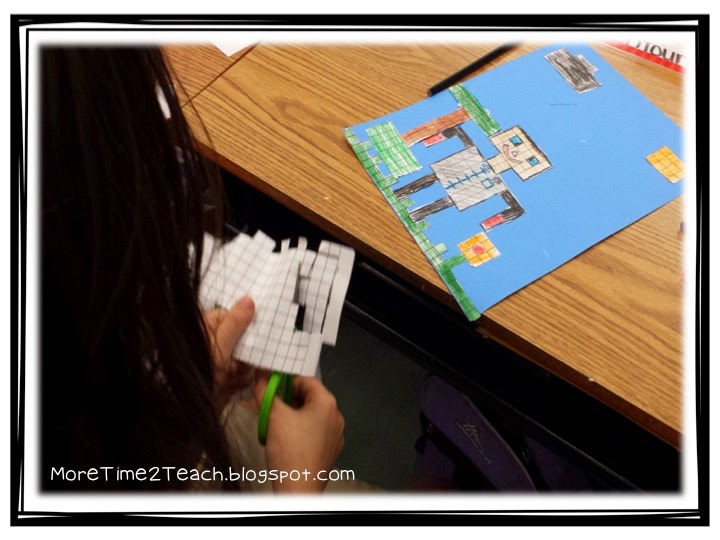
The next day they created a setting for their character. They could create anything they wanted as long as they made it out of squares. What they came up with was impressive. I told them our Art Teacher would be PROUD!
|
| Notice the rain drops and the lightning coming from the storm clouds. |
For our final step, I gave each student an index card and asked them to find the area of EVERYTHING on their picture!
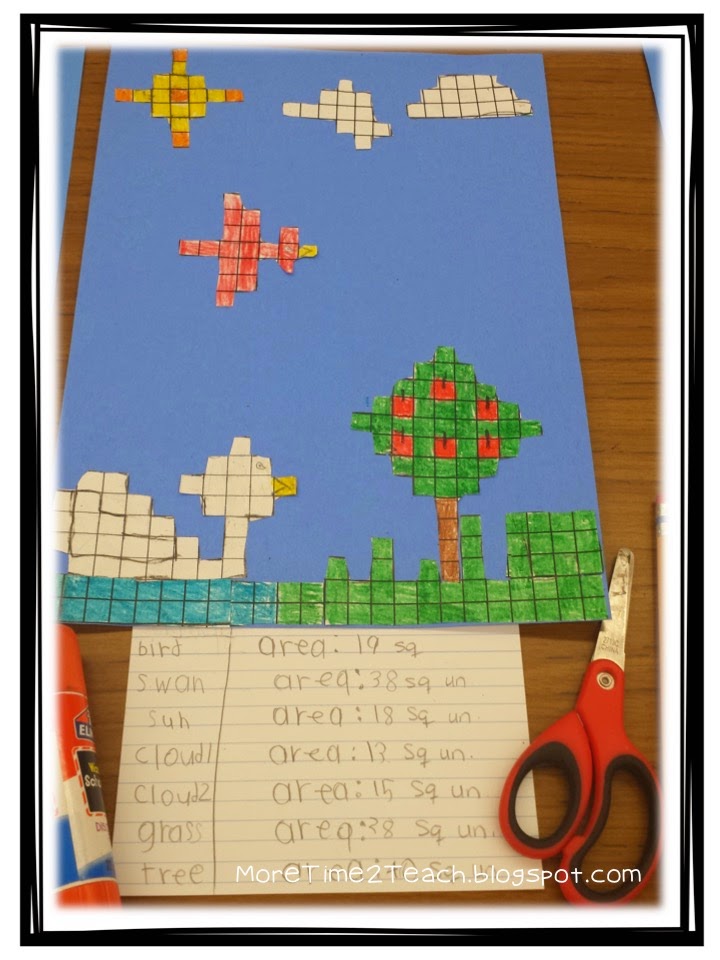
I’m proud to say that after ALL of our hands-on learning, I think they’ve got it!!!!!
Next up, polygons… Stay tuned to see what we’re up to!


4 Comments
Barb Evans
March 9, 2015 at 2:15 amHi! I'm following all the Vegas bound bloggers on the forum thread. I'd love to have you follow me back @ itsabouttimeteachers.blogspot.com. Super excited for Vegas!
Barb
Ashley & Jessica Schrage
April 21, 2016 at 2:10 amThis is great we are going to be doing this soon!
Darshana
October 25, 2017 at 6:25 amI found this is really great
I am providing training to teachers it help me like anything
thanks
Melissa
November 6, 2017 at 9:32 pmDarshana, I’m so glad to hear that you found this post so helpful! Hope your training was amazing!!!